How to cook Chicken Thighs in air fryer
One food that is a favourite of mine I discovered cooks extremely well in an air fryer, are chicken thighs which I will prioritise a juicy texture with super crispy skin.
How to cook bone-in, skin on chicken thighs in an air fryer would involve preparing the thighs at room temperature, with seasoning and oil to smother on all sides. Cook up to four thighs at 400°F / 200°C, for 25 minutes - with an option to baste multiple times during the cooking stage.
INSTRUCTIONS FOR AIR FRYING CHICKEN THIGHS:
Cooking any flavour chicken thighs in an air fryer can be quick and easy; its up to you whether you want to cook thighs in a basket lined with foil - with parchment paper also an option - or cook thighs without lining on top of a non-stick basket.
Neither is the better option in terms of producing juicy, succulent chicken; it just helps to add foil to collect juices to occasionally baste the thighs.
On the foil, juices can be poured into a bowl to re-apply over the skin-on chicken thighs, while allowing fat and oil to drop into the container, so you can pour the juices by emptying the oil/fat directly in a bowl - which will be used to pour over the thighs.
More important than all that would be to cook your medium size chicken thighs at 400°F / 200°C, for 25 minutes.
Chicken thighs you use to cook with will never match mine in size and weight, and thus its vitally important to adjust the cooking times to match your own. Be sure to check the label on the packaging for the oven cooking instructions, and reduce the cooking time up to 5-10 minutes to guarantee juicy thighs with a crispy skin.
Which reminds me, its important to only cook chicken thighs skin side up, which you will allocate the full cooking time to crisp up the skin.
No rush to cook chicken thighs but we don't want to overdo it as we risk drying them out.
To know when chicken thighs are properly cooked, do ensure the juices have run dry and what is hopefully crispy skin, is golden and bubbling.
Prepare thighs
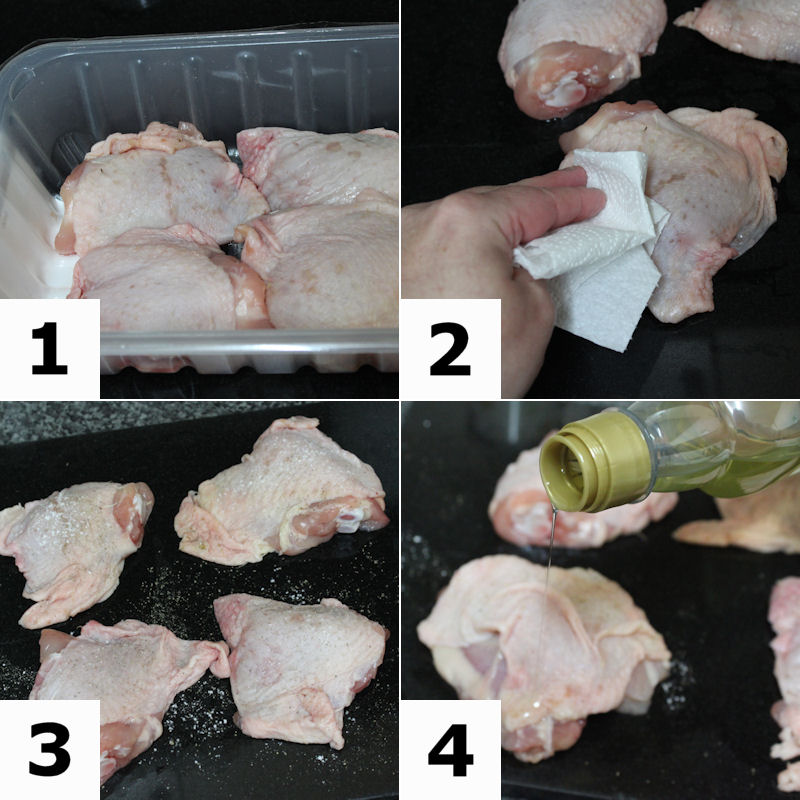
Preparing chicken thighs ready for the air fryer requires little effort on your part. First remove the thighs out of the fridge and let them sit at room temperature for a minimum of 30 to 40 minutes - we can then avoid air frying a too cold portion of chicken.
- STEP 1: Bring thighs to room temperature - Chicken thighs can sit in their original packaging with an opened film lid, to allow the cold internal temperature to escape.
- STEP 2: Dry thigh skin with paper towel - Do try to thoroughly pat dry your thigh skin in particularly, because the dryer it is, the more likely you can achieve a crispier skin
- STEP 3: Season (optional) - With thighs allowed to sit at room temperature and now dry as a bone; add a sprinkle of salt and pepper on the skin to lightly flavour
- STEP 4: Smother in cooking oil - To ensure our chicken thighs cook to a succulent, juicy texture, we can smother any cooking oil over the thighs to prevent drying out
Healthier chicken thighs would be better with no skin, salt and of course no oil which you can go without all, while still achieving tasty juicy chicken thighs.
Optional air fry on foil or without

Before you begin to preheat the air fryer which is an optional step I might add, you must of thought about adding the chicken thigh on foil which will line the basket.
I have decided to go with foil as I intend to catch the chicken juices along with the oil, in which I can use to baste my thighs multiple times during the air frying process. You can skip this step and simply air fry with no foil or even parchment paper in place.
I do know my air fryer basket is difficult to clean at this stage of life and thus I will prefer to prevent oil and grease getting to the basket.
Go without foil knowing the basket will be covered in both oil and chicken drippings, with marks left where the chicken underside has baked onto the non-stick coating.
Prepare air fryer basket
We've prepared the chicken thighs thus far, and now we must move onto preparing the air fryer, which will begin with an optional preheat of 5 minutes or more. And as I'll be lining the basket with foil, preheating will be the second step to prevent burns.
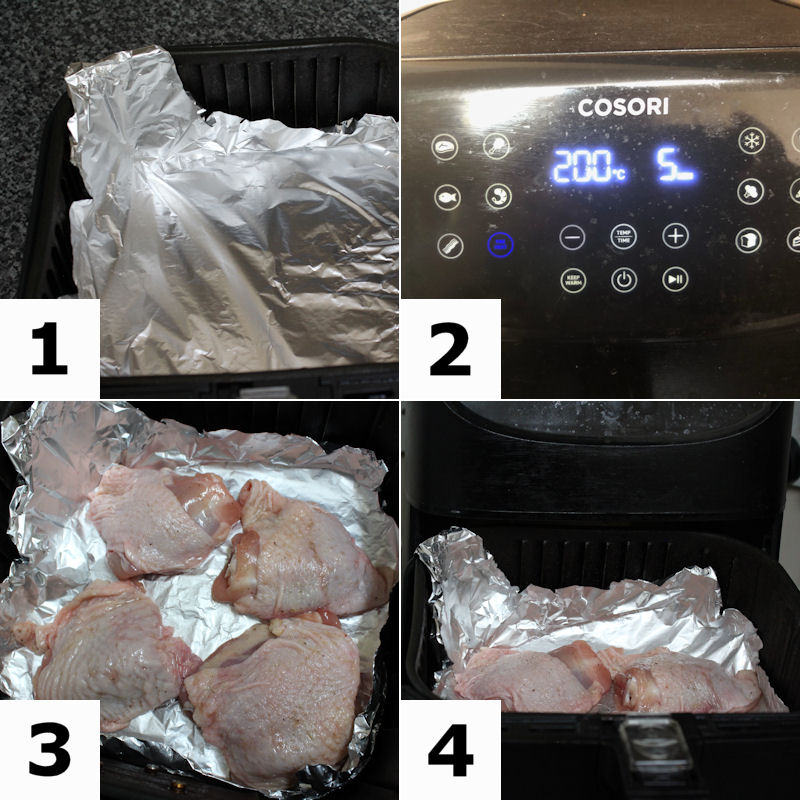
- STEP 1: Line basket with with foil - Take a sheet of foil to line the bottom of your air fryer basket with; ensuring there's an elevated border around the edges to prevent oil, chicken juices, and possibly marinade from spilling out
- STEP 2: Preheat for 5 minutes - Carefully remove the foil mould if you have done so - otherwise skip the first step all together - then preheat the air fryer for 5-10 minute with the foil always left out of the basket to prevent it floating about. After preheating, carefully return the foil back into the basket
- STEP 3: Sit thighs with NO touching - Sit up to four chicken thighs - skin side up of course - with space in between each thigh to allow proper air flow.
- STEP 4: Close basket to set timer and temp - Not much to it, simply close the air fryer basket which will allow you to set the time and temperature to cook the thighs
Cooking time of these four chicken thighs is short, thus I don't want to spend any time air frying the thighs skin-side down. I will instead spend the whole 25-30 minutes cooking the thighs only skin side up - which will ensure the skin gets nice and crispy.
Create optional 'Basting' funnel
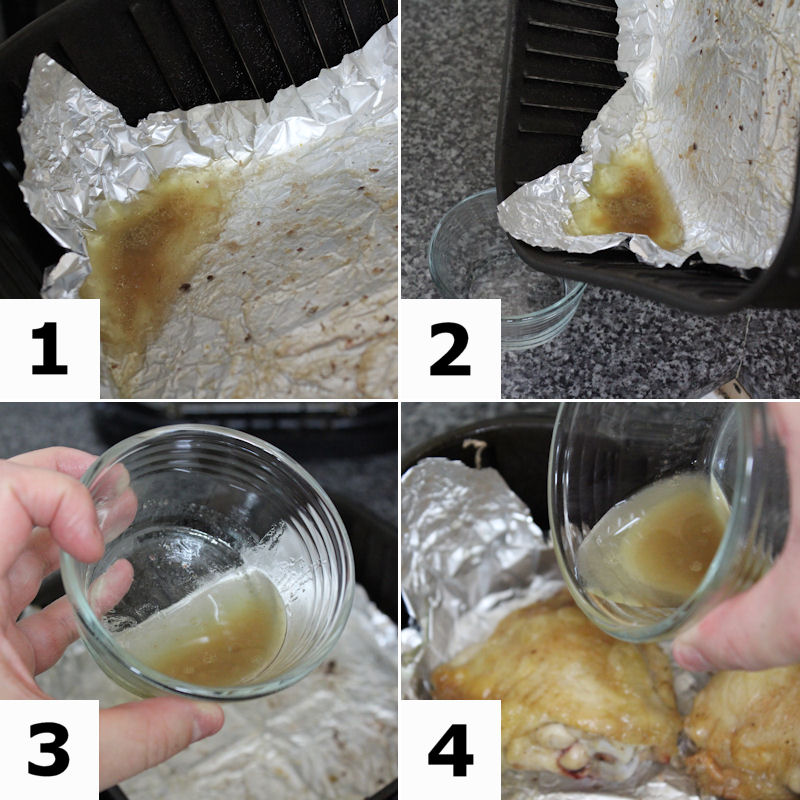
If you like to baste your chicken thighs, including other chicken portions like breasts - to ensure a juicy result - then follow these instructions to mould foil paper into the basket, of which it will include a funnel running up in the corner, to empty fat and oil into a bowl.
Bowl will sit on the counter as you carefully pour the hot oil and fat into the bowl.
I did this step three 3 times during the 25 minutes of cooking time to baste the thighs, which I found the funnel to loose its shape and strength within 10 minutes.
Going without foil of course would allow the fat and oil, and quite possibly marinade if you are air frying fresh or frozen marinated chicken thighs at this stage; to pour all marinades and juices back over the thighs.
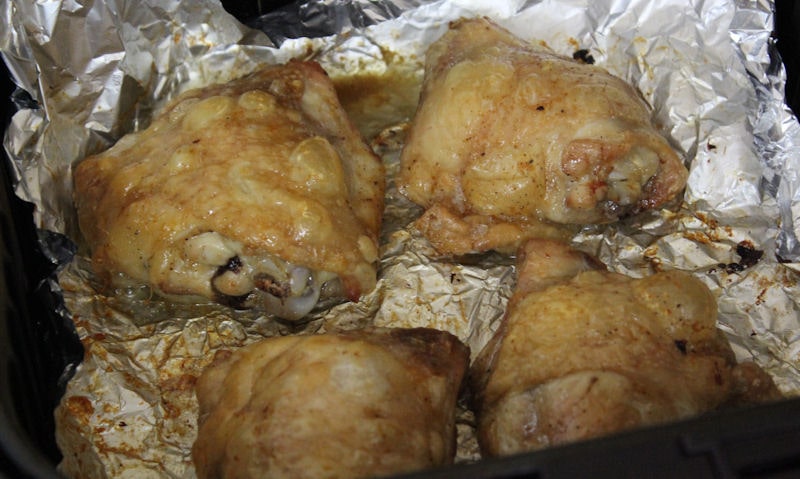
Cook 4 thighs at 400°F / 200°C, for 25 minutes
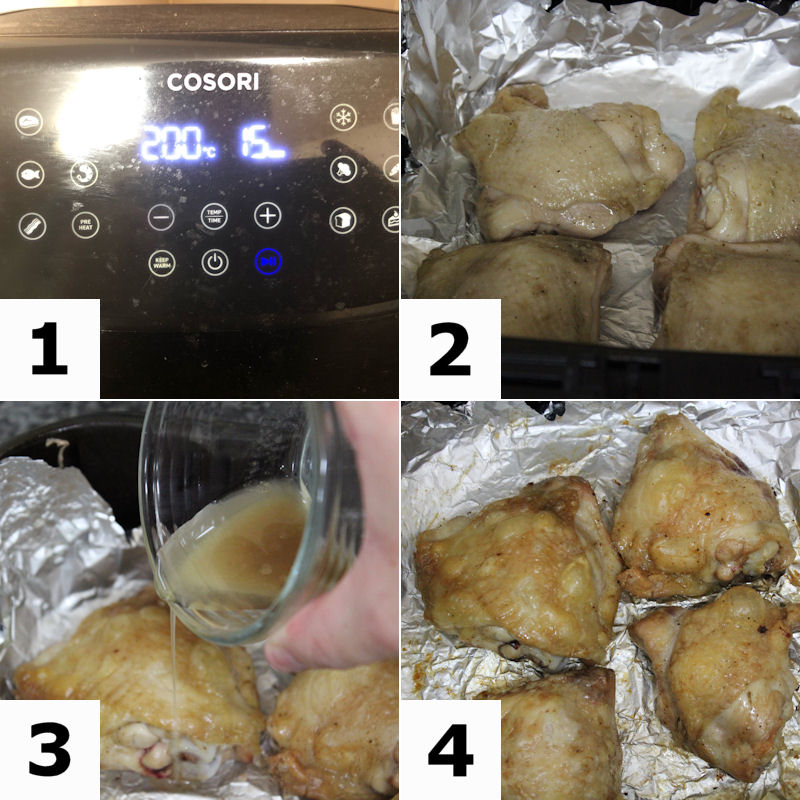
You should now be ready to begin the process of cooking up to four chicken thighs in the air fryer, for a minimum of 25 minutes at a high 400°F / 200°C temperature. I note, I used four skin-on chicken thighs which weighed approximately 200-230g each.
- STEP 1: Air fry for 10 minutes straight - How long to cook the chicken thighs will begin with a full 20 minutes without stopping; then open the air fryer to possibly baste the thighs for the first time - this is optional and can be avoided.
- STEP 2: 15 min. 'Move' thighs - At this stage chicken skin touching the foil can begin to stick; its vitally important to lift up the thighs to ensure skin its prevented from fusing to the foil - and you will do this every 5 minutes until the 20th minute
- STEP 3: 20 min. think about basting again - Now the thighs are near to being fully cooked, they would have produced a lot of oil and juices at this stage - and I feel its a wasted opportunity to not baste each thigh at least once
- STEP 4: 25-30 min. check for bubbling skin - We are now there, at 25 minutes you will want to ensure thigh juice are run clear and the skin is bubbling and crispy.
Depending on thigh size and weight, this can either reduce or increase the overall cooking time. Its important to know chicken juices must run dry to tell if chicken is cooked properly, which you can cut a thigh partially open to check, much like I do to be sure.
Ready to serve
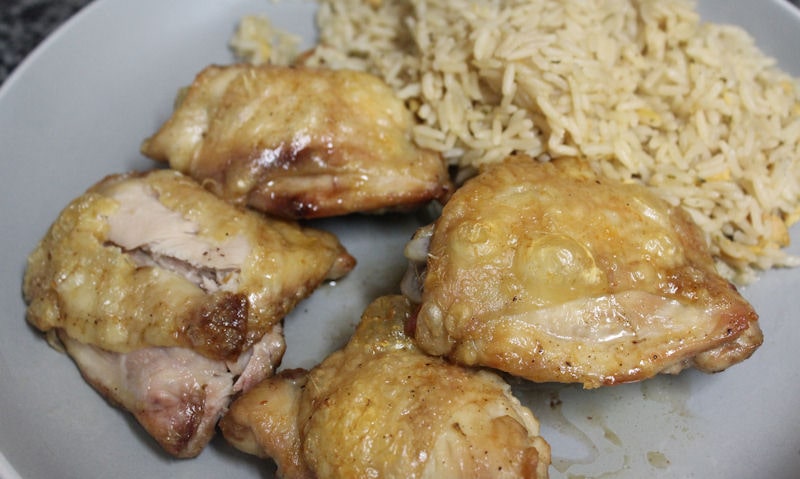
I kept it simple when I served myself all four chicken thighs, which complimented a microwave pouch of egg fried rice.
You can do the same with an option to serve the thighs with French fries and additional vegetables. Marinated chicken will provide serving suggestions on the pack - so do check long before you commit to air frying thighs.
Four chicken thighs was more than enough for me on this late evening, of which I could have snacked on them later - which I would of allowed them to cool - then pop them in the refrigerator for the next day.
It is possible to reheat chicken thighs in an air fryer which you must do so with caution.
Allow the thighs to come to room temperature out of the fridge, to then wrap the thighs individually in a loose foil parcel to allow air flow. Grouping all thighs into one foil wrap is possible, but will take longer to reheat.