How to cook Duck Breast in air fryer
Duck breast will air fry better than cooking in an oven, although this isn't possible unless you pan fry the skin-side prior to air frying.
While this would be a first time for us both, air frying a duck breast or two is quick and easy. It involves pan frying the breast skin-side down on an oil-free frying pan for 5 minutes; turning over for 1 minute to seal. Transfer the duck breast to a preheated air fryer, to cook for 15 minutes to a medium.
DIRECTIONS:
While it can be a little intimidating when thinking about cooking a duck breast in an air fryer, it isn't at all as it involves replicating the oven cooking instructions for air frying.
Cooking instructions were followed exactly which were featured on the back of the packaging in step-by-step pictures. Rather than transferring the pan fried duck breast to the oven, you simply place the breast into a preheated air fryer.
To prepare the duck breast for pan frying for 5 minutes prior to air frying; I made sure the breast was well dried, by patting it with a paper towel.
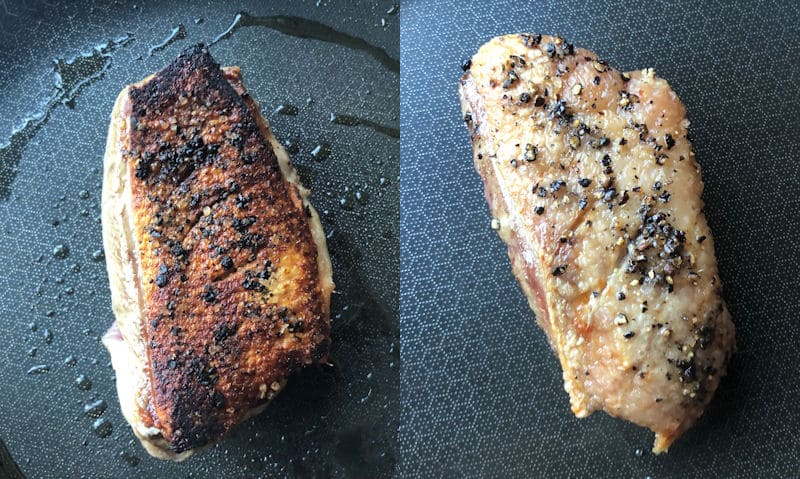
I continued to score the duck breast skin with a sharp knife, followed by sprinkling on freshly ground black pepper and sea salt.
Seasoning which I didn't know beforehand, did in fact help produce a crispy skin, and should apply to air frying duck legs to even a whole duck.
With the duck breast pan frying for 5 minutes, do use this time to preheat your air fryer for this time exactly.
When the duck breast is done in the frying pan, use a pair of tongs to transfer your duck breast into a hot air fryer, which should be lined in foil - where I used a foil tray to contain access fat - which will render out of your duck breast during a 15 minute air fry time.
Allow the duck breast to air fry for the full 15 minutes, and don't worry about the skin turning a little too dark - its perfectly normal and won't effect the taste of the duck.
Its imperative you pan fry the duck breast skin-side down prior to air frying, where your packaging should instruct you to.
If you avoid pan frying the duck breast skin-down as recommended to, be aware this will render breast skin which will be a little chewy, even if the taste is the same. With that, the following air fryer directions will render a 'medium' doneness. To produce a medium rare, you should cook the breast for 10 minutes on the air fry stage - which is 5 minutes less.
Prepare single Duck Breast
Whilst frying pan to oven cooking instructions will apply to an air fryer, its important you get the skin bone dry; with the first stage of searing the skin in the pan, an absolute must.
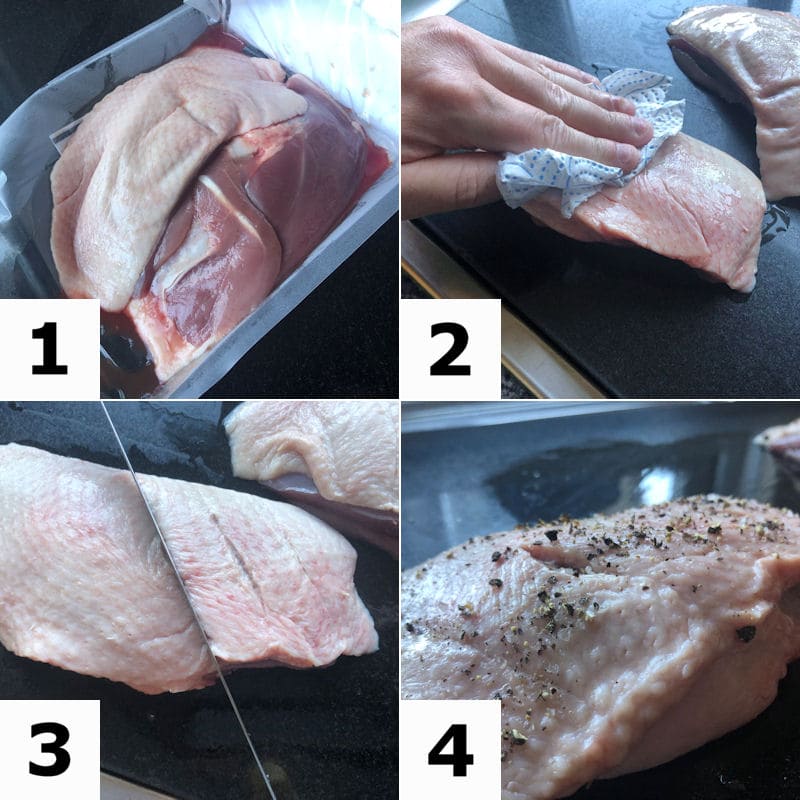
- STEP 1: Sit duck breast at room temperature - Its important to bring your duck breast up to room temperature, in an effort to reduce the chill internally
- STEP 2: Pat the skin dry with paper towel - Packaged duck breast will have access moisture on the skin, which dabbing with paper towel will help to absorb it
- STEP 3: Score the skin 6-7 times - Not necessary but because it was recommended on the packaging instructions, I did the same 6-7 times
- STEP 4: Season with Salt & Pepper - I found freshly ground salt and pepper burnt into the crispy skin nicely, and enhanced the flavour
NOTE: Scoring the duck breast skin isn't necessary but I found seasoning is a plus. Get that skin pat dried very well, as you'll produce crispy skin rather than soggy, chewy one.
How to air fry Duck Breast
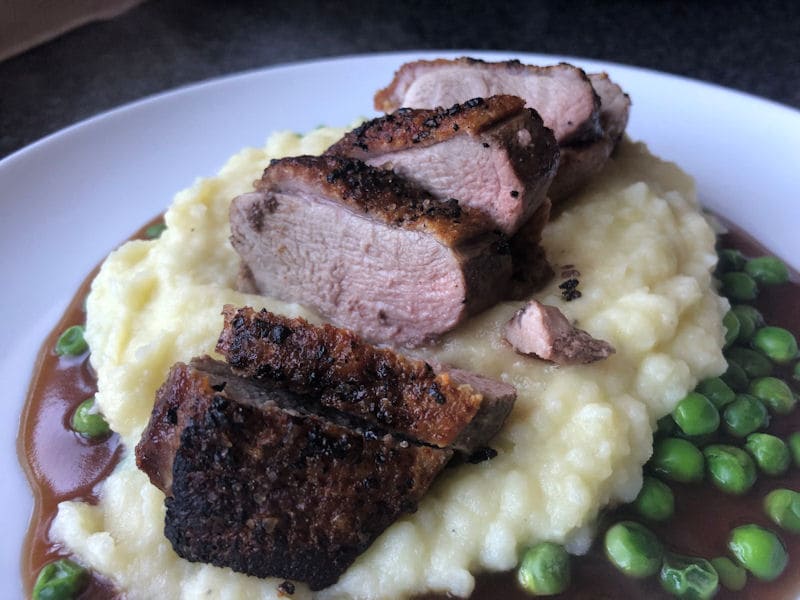
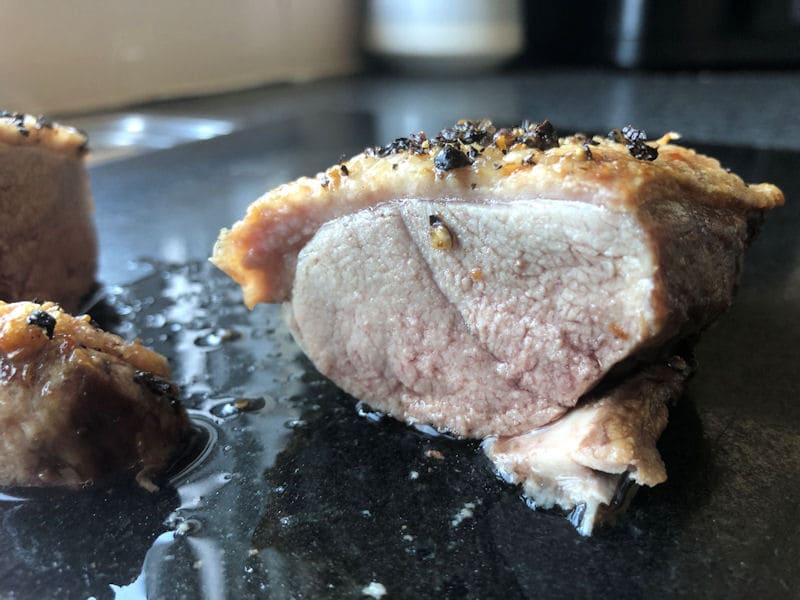
Following these pan frying to air fryer cooking instructions should produce a 'medium' done duck breast, which renders a little pink but is mostly brown meat.
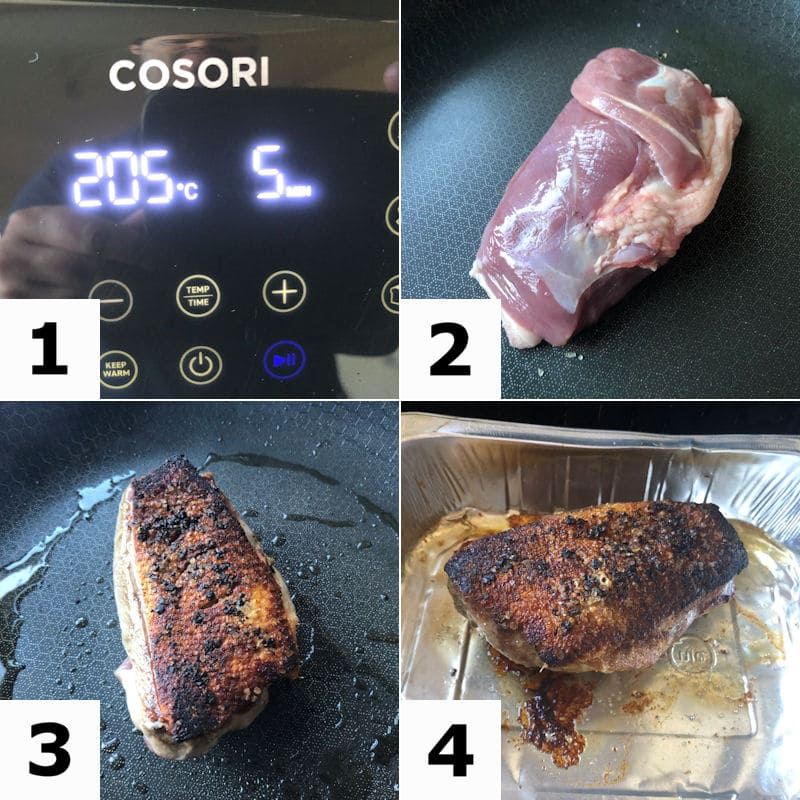
- STEP 1: PREHEAT air fryer: 5 Minutes - You'll be instructed to preheat your oven, which applies to preheating the air fryer in this scenario
- STEP 2: Place duck breast Skin-Side down in HOT frying pan - Fry duck breast for 5 minutes on a 'Medium Heat' until skin has turned a golden brown
- STEP 3: Turn breast over and sear the meat for 1 minute - Turn over the breast to sear what is the underside; if the breast insists on falling over, hold it with tongs
- STEP 4: Set temp to 355°F / 180°C; time to 15 minutes - Air fry duck breast to a medium; allow breast to rest for 4-5 minutes
NOTE: What you won't be told is, when pan frying the duck breast for the first 5 minutes, it produces a lot of smoke, thus its vital you have doors and window opens.
Cook in air fryer only; NO PAN frying
Because there was two duck breasts in my pack of Gressingham duck breast - weighing approximately 200g each - I took this opportunity to cook the breasts two way.
First cooking method is what I used to produce this 'how-to' guide, with the cooking instructions involving pan frying for 5 minutes - which is 6 minutes in total with the 1 minute on the opposite side - whilst air frying the duck breast for 15 minutes.
Second cooking method involved air frying the breast duck only, with no pan frying the breast with the skin-side down.
Now, let me tell you, the frying pan to air frying technique was the real winner.
Pan frying the skin for 5 minutes really did produce a crispy skin, which allowed the time needed to make it crispy and give it a dark in colour finish.
On the other hand, avoiding the pan frying whilst going straight to the air fryer, isn't the same in quality and texture - although the flavour is similar.
So you see, whilst the pan frying to air frying provided enough time to render most of the fat out of the duck breast; without pan frying there wasn't enough time to do the same, thus areas of the meat was a little too chewy.
Don't skip on pan frying skin-side down for 5 minutes, because it really helps to produce a crispier skin with a super tender duck breast throughout. Let me finish by saying, by pan frying first or missing out this step, the breast still air fried to a medium.
Summary
What a fun experience it was to air fry these pair of duck breasts, which for me was the first time cooking duck breast, and eating it.
I can now say duck breast is one of my favourite cuts of meat, better than chicken breast.
To cook the first duck breast, I basically followed the cooking instructions on the packaging, which involved pan frying skin-side down for 5 minutes - whilst finishing the breast off for a minute on the opposite side.
Duck breast was then transferred to a preheated air fryer - of which I used a foil tray to contain the access fat - where I air fried the breast for 15 minutes at 355°F/180°C.
Breast air fried to a 'medium' doneness which was soft, tender and juicy.
I wanted to be sure this method of cooking was the best option, thus I air fried the duck breast only whilst skipping on the 5 minute pan fry.
Let me tell you, the pan frying to air frying method is the best option, which cooked enough fat out of the duck which in effect, produced a more tender breast, with no chewiness - which it was for the second cooking method of NO pan frying.